guides
How to Use a Moka Pot
Step-by-step guide to brewing stovetop espresso with a moka pot. Grind size, heat, timing, common mistakes, and the best moka pot picks.
 Elena Marchetti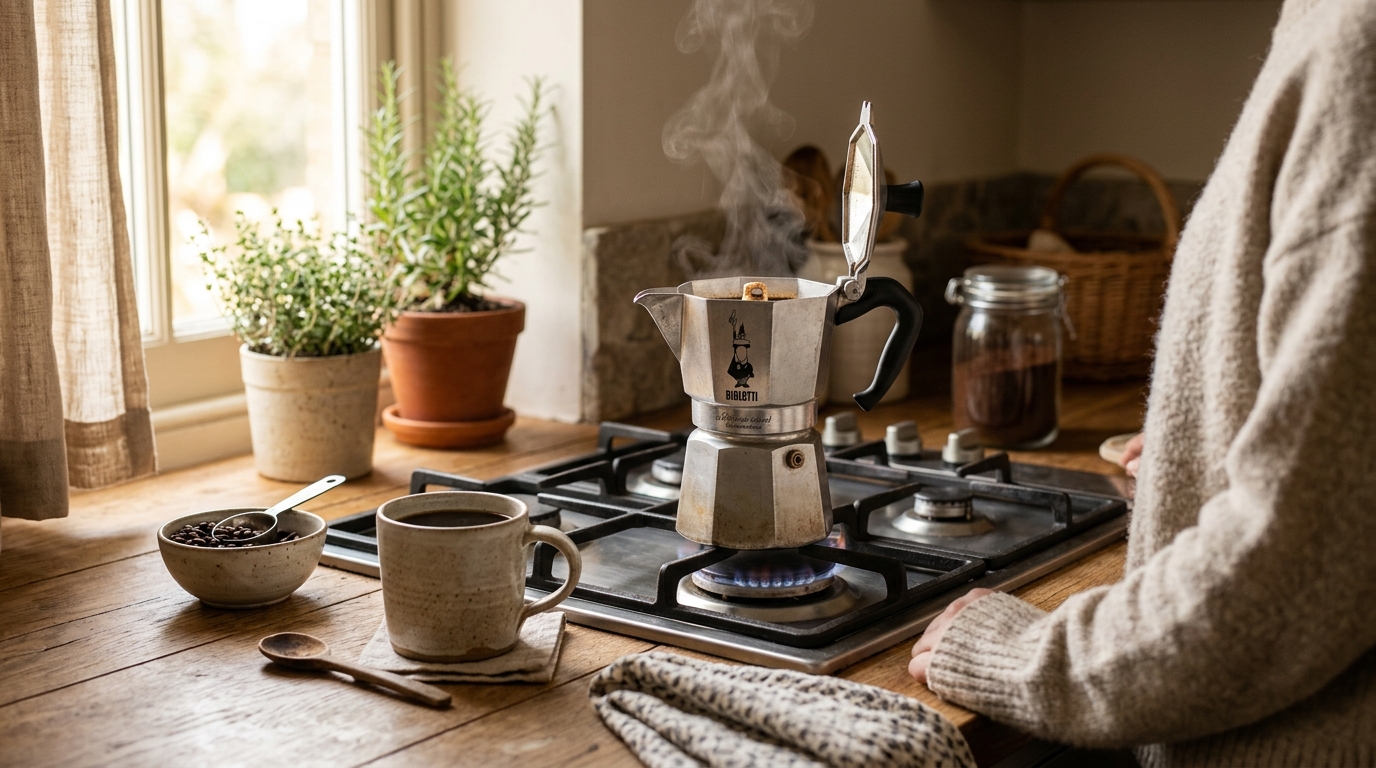
To brew stovetop espresso with a moka pot: fill the lower chamber with filtered water to just below the pressure relief valve, add a loosely filled funnel of medium-fine coffee, assemble, and place on medium-low heat until coffee flows steadily into the upper chamber — about 4-5 minutes. Remove from heat and pour immediately.
What is a moka pot and how does it work?
A moka pot is a stovetop coffee brewer that uses steam pressure to push hot water through ground coffee. It was invented by Alfonso Bialetti in 1933 and the design has barely changed: a lower water chamber, a coffee funnel that sits inside it, and an upper collection chamber connected by a central tube.
When water in the lower chamber heats up, it generates steam pressure of around 1-2 bars. That pressure pushes the hot water up through the coffee funnel and into the upper chamber, where it collects as a dark, concentrated brew. The process takes 4-5 minutes from a cold start.
The result is not true espresso — true espresso requires 9 bars of pressure from a pump machine. Moka pot coffee is more concentrated than drip but closer to strong drip in extraction than to pump espresso. Still, it is intensely flavorful, has real body, and works beautifully as a base for milk drinks or diluted with hot water as a long black.
What you need before you start
A moka pot. The most common sizes are 3-cup and 6-cup, which brew roughly 6 oz and 12 oz of coffee respectively — note that moka pot “cups” refer to 2 oz espresso-style portions, not 8 oz cups. The 3-cup is the right size for one or two people.
Coffee ground to medium-fine. This is the single biggest variable in moka pot quality. Pre-ground espresso from the supermarket is usually too fine and causes over-extraction. Pre-ground drip coffee is too coarse. Freshly ground coffee at the medium-fine setting produces noticeably better results than anything pre-ground.
Filtered or bottled water. Hard tap water leaves mineral deposits on the interior valve and can impart a metallic taste. Filtered water produces cleaner, brighter coffee and extends the life of the rubber seal and aluminum components.
Best for grinding fresh coffee for moka pot and espresso at home
Baratza Encore ESP Burr Grinder
Freshly ground coffee makes a bigger difference in a moka pot than almost any other variable. The Baratza Encore ESP covers grind settings from espresso to French press with consistent particle size and simple adjustment. Around $200, it delivers a clear flavor upgrade over pre-ground within a few weeks of daily use.
★★★★★ 4.7 · 8,500 reviews
Check current price on Amazon→How to use a moka pot: step by step
1. Fill the lower chamber with water
Unscrew the moka pot and remove the funnel. Fill the lower chamber with filtered water to just below the pressure relief valve — the small brass or steel valve on the side of the lower chamber. Never fill above it. Overfilling forces water into the coffee funnel before brewing starts and leads to inconsistent extraction.
Cold water works, but starting with pre-heated water from a kettle is better. Pre-heated water reduces the time the coffee grounds sit on the warming base before water reaches them, which means less scorching and more even extraction.
2. Fill the funnel with coffee
Place the filter funnel into the lower chamber and fill it with medium-fine ground coffee. Level off the top of the funnel with a finger or a flat tool — you want the coffee to reach just to the rim, not piled above it.
Do not tamp. This is the most common moka pot mistake. Tamping the grounds creates back pressure that 1-2 bars of steam cannot overcome. The result is a slow, over-extracted brew with bitter, metallic notes. Fill loosely, level off, and leave it.
3. Assemble the moka pot
Place the upper chamber on the lower chamber and screw them together. Hold the lower chamber with a cloth if you pre-heated the water — it will be hot. Screw until snug but not overtightened. The rubber gasket creates the seal. Overtightening compresses the gasket faster and leads to earlier seal replacement.
4. Place on medium-low heat
Set the moka pot on the smallest burner available and use medium-low heat. The base of the lower chamber should be fully covered by the flame or element — a burner too large wastes heat on the sides and heats unevenly. On a gas stove, the flame should be visible under the pot but not licking up the sides. On electric: a setting of 3-4 out of 10.
Keep the lid open so you can monitor the brew.
5. Watch and listen
After 2-3 minutes, you will start to hear a low hiss as steam pressure builds. Then dark, concentrated coffee will begin to emerge from the center tube into the upper chamber. Watch the color: the first flow should be dark amber to brown.
When the flow turns from dark to light tan and begins to sputter with air bubbles, remove the moka pot from the heat immediately. The sputtering signals the lower chamber is nearly out of water. Continuing to heat at this point forces dry steam through the remaining grounds and produces harsh, bitter coffee.
6. Stop the brew
For even better control, wrap the base of the lower chamber in a cold, damp cloth as soon as you remove it from the heat. This stops residual heat from continuing the extraction. Alternatively, run the lower chamber briefly under cold water. This step is optional but noticeably improves consistency and reduces bitterness at the end of the brew.
7. Pour and serve
Pour immediately once the upper chamber is full. Moka pot coffee sitting on residual heat continues to extract and turns bitter within a minute or two. Give the upper chamber a quick stir before pouring — the first coffee out tends to be more concentrated than what follows, and stirring distributes it evenly.
Getting the grind right
Grind size is the most impactful variable after heat. The target is medium-fine — roughly the texture of fine table salt, slightly coarser than table sugar.
Signs the grind is too fine: slow brew, sputtering before the upper chamber fills, bitter and harsh flavor, visible grounds in the cup. The lower chamber will often still contain water when sputtering starts because the grounds are blocking the flow.
Signs the grind is too coarse: fast brew under 3 minutes, watery pale color, weak and sour-leaning flavor. The water flows too quickly through large-particle grounds before fully extracting.
Dialing in: if you grind your own coffee, start at a medium-fine setting and adjust one step finer if the brew tastes sour and watery, or one step coarser if it is bitter. On a Baratza Encore, settings around 10-12 work well for a 3-cup moka pot — but always dial in based on your own results.
How much coffee to use
A standard 3-cup moka pot funnel holds around 15-18 grams of coffee, roughly 3 tablespoons loosely packed. Use enough to fill the funnel to just below the rim without tamping. Do not use less than a full funnel — the water-to-coffee ratio is calibrated for a full funnel, and under-filling produces weak, watery results.
Choosing the right moka pot size
| Product | Best for | Rating | Notes | |
|---|---|---|---|---|
| 1-cup | Solo single shot | ★★☆☆☆ | Brews about 2 oz; very difficult to control heat evenly and heats unevenly — most home brewers skip this size | — |
| 3-cup | One or two people | ★★★★★ | Brews about 6 oz; the most versatile size, easiest to control, and the standard recommendation for home use | — |
| 6-cup | Two to four people | ★★★★☆ | Brews about 12 oz; good for small groups but requires more coffee and a longer brew time | — |
| 9-cup | Four or more people | ★★★☆☆ | Brews about 18 oz; heat control becomes difficult — using a 6-cup twice tends to be more consistent | — |
| 12-cup | Entertaining | ★★☆☆☆ | Large and slow; rarely the right choice unless regularly making coffee for a large group | — |
What to look for in a moka pot
Material: aluminum vs. stainless steel. Aluminum heats faster and is lighter. Stainless steel is more durable, dishwasher-safe, and compatible with induction cooktops. If you have a gas or electric coil stove, aluminum performs slightly better. If you have an induction stovetop, stainless steel is required — aluminum does not work on induction.
Spout design. The shape and angle of the upper chamber spout affects pour control. The classic Bialetti octagonal design pours cleanly into a small cup. Rounder designs can drip or splash. If you are making milk drinks that require precision pouring, spout shape matters.
Seal quality. The rubber gasket between the upper and lower chambers is a wear part. Budget moka pots often use thinner gaskets that need replacing within six months. Bialetti and other established brands use thicker gaskets that last 1-2 years with regular use, and replacement gaskets are available everywhere.
Best moka pots to buy
Best for gas and electric stovetop — the classic benchmark
Bialetti Moka Express Stovetop Coffee Maker
The original moka pot in continuous production since 1933. The aluminum octagonal body heats quickly and evenly, the valve and seal are reliable, and replacement gaskets are available at most kitchen stores and online. The 3-cup version at around $35-40 is the right size for most home brewers. Available from 1 to 12 cups.
★★★★★ 4.7 · 58,000 reviews
Check current price on Amazon→Best for induction stovetop brewing
Bialetti Venus Stainless Steel Induction Moka Pot
The stainless steel, induction-compatible version of the Moka Express. Same reliable gasket and valve system but in stainless, which is also dishwasher safe and more durable long-term. The 4-cup size brews about 8 oz and is the most popular option for induction kitchens. Around $40-55.
★★★★★ 4.6 · 22,000 reviews
Check current price on Amazon→Best for budget-friendly alternative with a clean pour spout
Grosche Milano Stovetop Espresso Maker
Grosche offers solid build quality at a lower price than Bialetti, with a spout design that pours more cleanly into small cups. Available in both aluminum and stainless versions. The 6-cup aluminum model is around $30 and a reliable daily driver. Replacement parts are standard size and compatible with most moka pot gaskets.
★★★★★ 4.5 · 15,000 reviews
Check current price on Amazon→Common moka pot mistakes
Using too much heat. High heat forces water through the grounds too quickly and scorches the coffee on the way up. It also overheats the upper chamber and can cause the gasket to deteriorate faster. Medium-low heat gives you control and produces better extraction every time.
Tamping the coffee. Every espresso guide tells you to tamp — but that applies to pump machines, not moka pots. Tamping in a moka pot blocks flow at the pressure levels steam generates on the stovetop. Fill loosely, level off, and leave it alone.
Ignoring the sputter. The sputtering sound near the end of brewing is a clear signal, not background noise. Once you hear it, the brew is done. Leaving a moka pot on heat after sputtering begins produces harsh, undrinkable coffee from steam passing through near-empty, scorching grounds.
Not cleaning it properly. Moka pots should be rinsed with hot water after every use and dried completely before reassembling. Soap can remove the coffee patina that builds up inside aluminum over time and affect flavor. Unscrew the base, remove the funnel and gasket, rinse all parts under hot water, and leave disassembled to air dry.
Using a brand-new moka pot without seasoning it first. New aluminum moka pots can impart a metallic taste from factory residue. Brew and discard two or three pots of inexpensive coffee before your first real use. The interior develops a protective patina that eliminates the metallic note within a few sessions.
FAQ
Frequently asked questions
Can I use a moka pot on an induction stove?
Why does my moka pot coffee taste bitter?
How much coffee does a 3-cup moka pot make?
Do I need espresso roast coffee in a moka pot?
How often should I replace the moka pot gasket?
Should I leave the lid open or closed while brewing?
Bottom line
The moka pot is one of the simplest, most rewarding coffee brewers at any price point. The technique comes down to four things done right: medium-low heat, a medium-fine grind, a loosely filled funnel without tamping, and removing the pot from heat when the flow starts to sputter. Get those right and you will produce consistently excellent stovetop espresso every morning.
For more: moka pot vs. espresso machine, how to pull a perfect espresso shot, espresso grind size guide, and how to store coffee beans.