guides
Espresso Extraction Yield Guide
What extraction yield means for espresso, how to calculate brew ratio, and how to use both numbers to dial in better-tasting shots.
 Elena Marchetti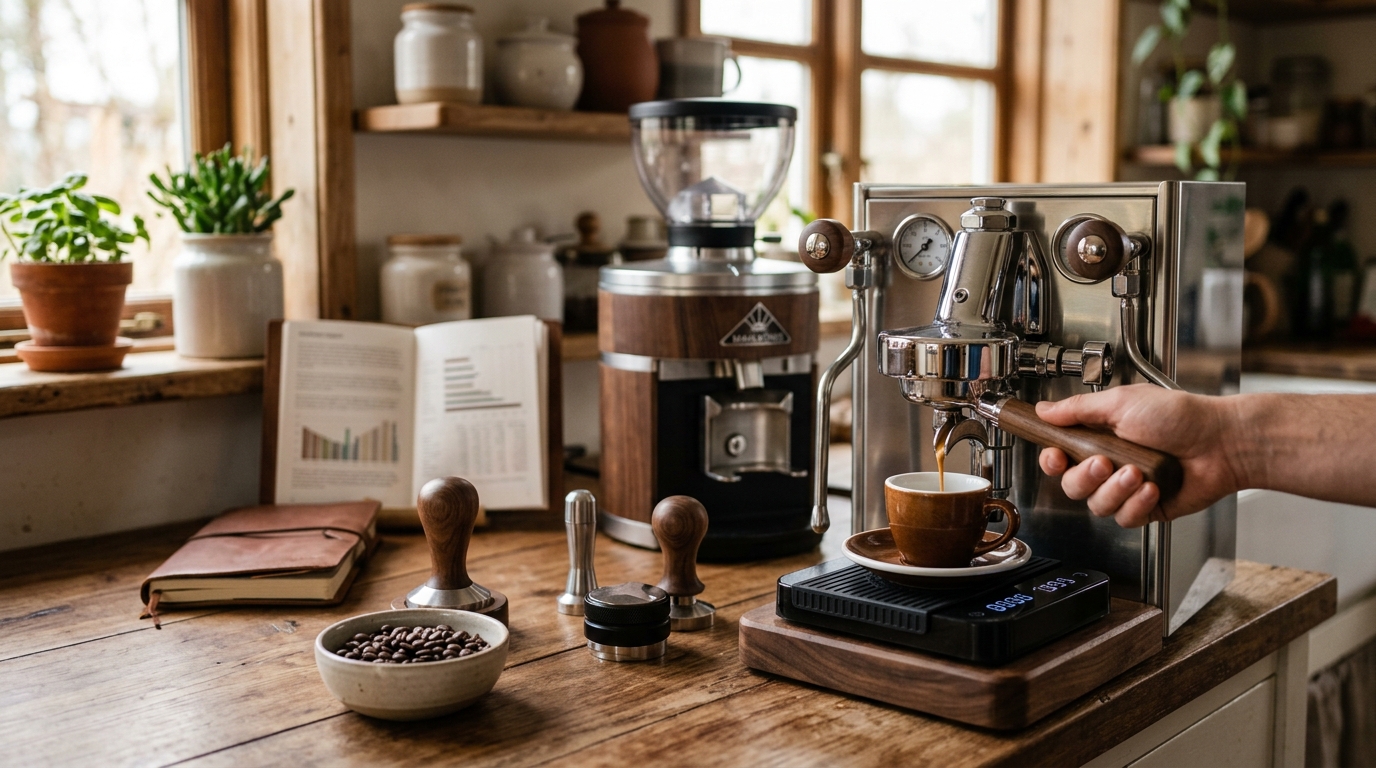
For espresso, target an extraction yield of 18-22% by pulling a 1:2 brew ratio — 18g of coffee producing 36g of liquid espresso in 25-30 seconds. Yield below 18% tastes sour and thin; above 22% turns bitter and harsh. Weigh your dose and output on a scale to hit the number consistently.
What is espresso extraction yield?
Extraction yield is the percentage of soluble compounds pulled out of your coffee grounds and dissolved into the liquid espresso. Coffee grounds contain roughly 28-30% soluble material; the rest is insoluble fiber and cellulose that stays behind in the puck.
The Specialty Coffee Association (SCA) defines the ideal extraction range as 18-22% of the coffee dry weight. Below 18%, you are under-extracting — the shot is missing flavor compounds that would balance its sourness. Above 22%, you are over-extracting — pulling bitter and astringent compounds that should have stayed in the puck.
The practical math: if you use 18g of coffee grounds and extract at 20%, your shot contains roughly 3.6g of dissolved coffee solids. The rest of the volume is water.
Extraction yield vs. brew ratio: what is the difference?
These two numbers are related but measure different things:
- Extraction yield (%): how much of the coffee mass ended up in your cup — requires a refractometer or formula to calculate
- Brew ratio (1:X): the weight of coffee in vs. espresso out — what you can measure right now with a kitchen scale
Most home baristas never need to calculate extraction percentage directly. Brew ratio is the practical handle. If you are pulling a 1:2 ratio in 25-30 seconds and the shot tastes balanced, your extraction yield is almost certainly in the 18-22% range already.
What brew ratio should I use for espresso?
The 1:2 ratio — one part coffee to two parts liquid espresso by weight — is the standard starting point. For an 18g dose, that means stopping at 36g of output. For a 20g dose, stop at 40g.
| Product | Best for | Rating | Notes | |
|---|---|---|---|---|
| Ristretto (1:1 to 1:1.5) | Concentrated, syrupy espresso | — | Heavy body, intense sweetness, very low bitterness. Pulls in 15-20 seconds. Works best with medium-dark roasts. | — |
| Normale (1:2 to 1:2.2) | Classic espresso balance | — | The standard starting point for most machines and roasts. Balanced flavor, moderate body, and crema. | — |
| Lungo (1:3 to 1:4) | Lighter, more dilute espresso | — | Higher extraction, longer pull (35-45 seconds). Risk of bitterness increases; works better with light roasts. | — |
| Filter-style (1:4 to 1:5) | Light roast specialty espresso | — | Popular in specialty cafes for light roasts. Emphasizes clarity and fruity notes. Requires fine grind and precise pressure control. | — |
Ratio is not a fixed rule — it is a dial. The same beans can taste dramatically different at 1:1.5 vs. 1:3. Many specialty roasters now print a recommended brew ratio on the bag. When a roaster specifies 1:2.5, that is worth trying before defaulting to your usual number.
How to calculate your extraction yield at home
If you want the actual percentage (useful for fine-tuning), you can estimate it from your brew ratio and dose with this formula:
Estimated extraction yield (%) = (Output weight ÷ Input weight) × 11.5
This assumes a typical espresso TDS of around 8-10%, which holds true for most 1:2 to 1:2.5 pulls on well-maintained machines. It puts you within 1-2% of the real number.
Example: 18g dose → 36g output. (36 ÷ 18) × 11.5 = 2 × 11.5 = 23%. That tells you the shot may be slightly over-extracted and suggests shortening the pull to 32-33g or coarsening the grind slightly.
For a precise measurement, a coffee refractometer reads TDS directly and skips the estimation entirely.
Step-by-step: dialing in your extraction yield
Step 1: Set a consistent dose
Choose a dose that matches your basket size — 18g for a standard 18g basket, 20g for a 20g basket. Weigh it to 0.1g precision. Dose variation of even 0.5g shifts extraction measurably and makes other adjustments hard to interpret.
Step 2: Pull a shot with a scale under the cup
Place your cup on a scale, tare to zero, start the pump, and stop when you hit your target output weight. Record dose, yield weight, and shot time. This is your baseline reference point.
Step 3: Taste and evaluate
- Sour, sharp, or thin → under-extracted. Extend the yield by 3-4g, grind finer, or raise extraction temperature.
- Bitter, harsh, or dry → over-extracted. Shorten the yield by 3-4g, grind coarser, or lower temperature.
- Sweet, balanced, some acidity and body → you are in range.
Step 4: Adjust ratio before changing grind size
Many baristas reach for the grinder first, but brew ratio adjustments are faster and more targeted:
- Add 2-4g to output to raise extraction and reduce sourness
- Remove 2-4g from output to lower extraction and tame bitterness
Only move the grinder when you have adjusted both ratio and time and still cannot find balance. Grind size shifts time, ratio, and flavor simultaneously — it is a larger variable that is harder to isolate.
Step 5: Lock in your recipe
Once the shot tastes right, write down: dose, target yield, shot time, grinder setting, and bean name. With the same beans, you should be able to reproduce the shot within one or two attempts each morning.
How roast level affects optimal extraction yield
Roast level significantly shifts the usable extraction range.
Light roasts are denser, more resistant to extraction, and contain complex acids that taste sour unless fully developed. A standard 1:2 ratio often under-develops light roasts. Many specialty light roast espresso recipes call for 1:2.5 to 1:3 ratios and temperatures of 93-96°C (199-204°F) to reach proper development.
Medium roasts are the baseline the SCA charts assume. A 1:2 ratio at 90-93°C (194-200°F) hits the 18-22% window reliably for most medium espresso roasts without further adjustment.
Dark roasts extract easily and quickly. At a 1:2 ratio, bitterness compounds are already available and over-extraction happens fast. A shorter pull — 1:1.5 or 1:1 for a ristretto — concentrates sweetness and limits harshness. Dark roasts also benefit from lower temperatures (88-91°C / 190-196°F).
When switching dramatically between roast levels, plan to re-dial from scratch rather than shifting just one or two clicks.
Why you need a scale to track extraction yield
Measuring espresso volume in milliliters rather than grams introduces significant error. Crema is mostly CO2 bubbles; as the shot sits, crema collapses and volume shrinks noticeably. The same shot can appear as 40mL immediately and measure 30mL sixty seconds later — a 25% difference. Weight does not change.
Even experienced baristas who rely on visual cues will find that switching to a scale reveals shots running 3-8g from their intended yield. That gap is the difference between 18% and 23% extraction — exactly the range that separates sour, under-developed shots from bitter, over-extracted ones.
Tools for measuring and hitting your target yield
Best for home baristas who want the most reliable shot-to-shot data
Acaia Pearl Espresso Scale
The Acaia Pearl is the benchmark home espresso scale — 0.1g resolution, fast update rate, and a connected app that graphs extraction curves in real time. Auto-tare, auto-start via Bluetooth, and a waterproof surface make it the smoothest workflow of any espresso scale. At around \$230, it is expensive but accurate and built to last years of daily use.
★★★★★ 4.8 · 3,100 reviews
Check current price on Amazon→Best for accurate yield tracking at a fraction of the Acaia price
Timemore Black Mirror Basic Plus Scale
The Timemore Black Mirror Basic Plus gives you 0.1g resolution, fast response, and a built-in timer in a slim package that fits under most portafilters. No Bluetooth, no app — just reliable weight and time. At around \$60-70, it is the best value espresso scale for most home baristas who want to control brew ratio without spending Acaia money.
★★★★★ 4.6 · 2,400 reviews
Check current price on Amazon→Best for baristas who want to measure actual extraction percentage
VST Coffee Lab Refractometer
The VST refractometer reads TDS directly from your espresso and, combined with dose and yield weights, calculates the real extraction yield percentage. It is the only way to know your actual number rather than an estimate. At around \$300-350, it is a professional tool most home baristas do not need — but if you want lab-precision data or are comparing roasts systematically, nothing else gives you this.
★★★★★ 4.5 · 420 reviews
Check current price on Amazon→Common extraction yield mistakes
Measuring volume instead of weight. Espresso crema throws off visual volume estimates by 15-25%. Always weigh your output.
Changing grind and ratio at the same time. When two variables move at once, you cannot tell which change caused which result. Change one variable at a time.
Pulling to time instead of weight. “Pull for 28 seconds” is a rough guide, not a recipe. The same pull time can produce 30g or 45g depending on grind, dose, and machine state. Use weight as your stop signal.
Ignoring basket volume. Putting 22g of coffee into an 18g basket creates uneven pressure and channeling regardless of how good your ratio math is. Match dose to basket size.
Assuming inconsistency is a grind problem. If you are dosing 17.3g one shot and 18.8g the next, the flavor variance comes from the dose — not the grind, ratio, or machine. Consistent dosing is the foundation everything else builds on.
FAQ
Frequently asked questions
What is the ideal extraction yield for espresso?
What brew ratio should I start with for espresso?
How do I estimate extraction yield without a refractometer?
Why does my espresso taste different every morning if I use the same recipe?
Does a longer shot always mean higher extraction yield?
Can I adjust extraction yield without changing grind size?
Bottom line
Extraction yield tells you how much of your coffee ends up in the cup; brew ratio is how you control it without a lab. Start at 1:2 in 25-30 seconds — extend the pull if the shot is sour, shorten it if the shot is bitter. Add a scale to your workflow and you have everything needed to dial in consistently without relying on guesswork or volume estimates.
For the complete dialing-in workflow: how to dial in espresso. For grind size as a complement to ratio: espresso grind size guide. For troubleshooting shots that will not balance: espresso shot troubleshooting. For scale recommendations at every price point: best espresso scales.